Vanilla paste recipe is one of those little kitchen secrets that can turn ordinary desserts into something truly extraordinary. With its thick texture and gorgeous flecks of real vanilla seeds, homemade vanilla paste delivers a richness that bottled extracts simply can’t match. It’s fragrant, slightly floral, and brings a soft, deep sweetness that perfumes every bite.
In traditional American kitchens, vanilla paste recipe has always been a cornerstone flavor—showing up in everything from cakes and cookies to custards and puddings. Making your own vanilla paste at home isn’t just a nostalgic nod to those times, it also gives you full control over quality and taste. The beauty of this recipe lies in its simplicity: just a handful of wholesome ingredients blended into pure magic.
Below, you’ll find the full recipe ready and waiting for you. But before you jump ahead, be sure to take a look at the handy tips and tricks we’ve gathered. They’ll help ensure your vanilla paste turns out smooth, flavorful, and ready to star in your favorite sweet treats.
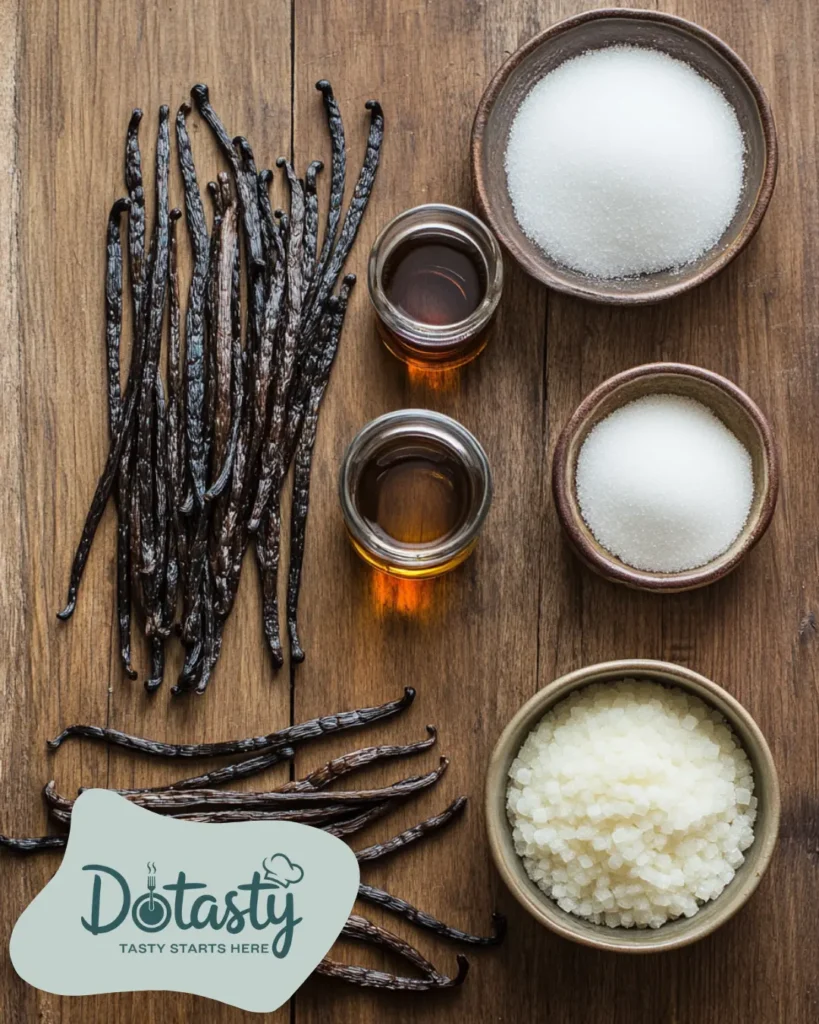
Vanilla paste recipe Ingredients
Every great vanilla paste recipe starts with quality ingredients. The beauty of making it at home is that you can choose the finest elements and even tweak the flavors to suit your baking style. Here’s a look at what you’ll need, along with a few substitution ideas in case you want to get creative or use what you have on hand.
- Vanilla Beans:These are the heart and soul of the recipe. Look for plump, moist vanilla beans with a strong, sweet aroma. Madagascar, Tahitian, or Mexican varieties all work beautifully. If you’re short on beans, you can use vanilla powder as a backup, though the paste won’t have those signature specks, for your vanilla paste recipe.
- Sweetener:Traditional vanilla paste often uses white granulated sugar to enhance the natural sweetness. For a softer flavor, you can substitute with honey or agave syrup. Just remember that liquid sweeteners can make the paste a little thinner, so adjust the simmering time if needed.
- Alcohol (Vodka or Rum):A small amount of alcohol extracts the full flavor from the beans and helps preserve the paste. Vodka is neutral and lets the vanilla shine, while rum adds a touch of warmth and spice. If you prefer to avoid alcohol, you can replace it with a small splash of water and a little vegetable glycerin.
- Thickener:Corn syrup is often used to give vanilla paste its silky, glossy texture. For a natural alternative, you might try glycerin or even maple syrup for a slightly woodsy undertone.
Choosing the right combination of these ingredients will help you craft a vanilla paste recipe that feels as indulgent and genuine as anything you’d find in a high-end bakery.
How To Make Vanilla Paste Recipe (Step-by-Step Guide)
Making this vanilla paste recipe is easy if you follow these steps! It’s a comforting, hands-on process that fills the kitchen with the most wonderful scent. Just take your time with each stage and you’ll have a beautiful jar of homemade vanilla paste before you know it.
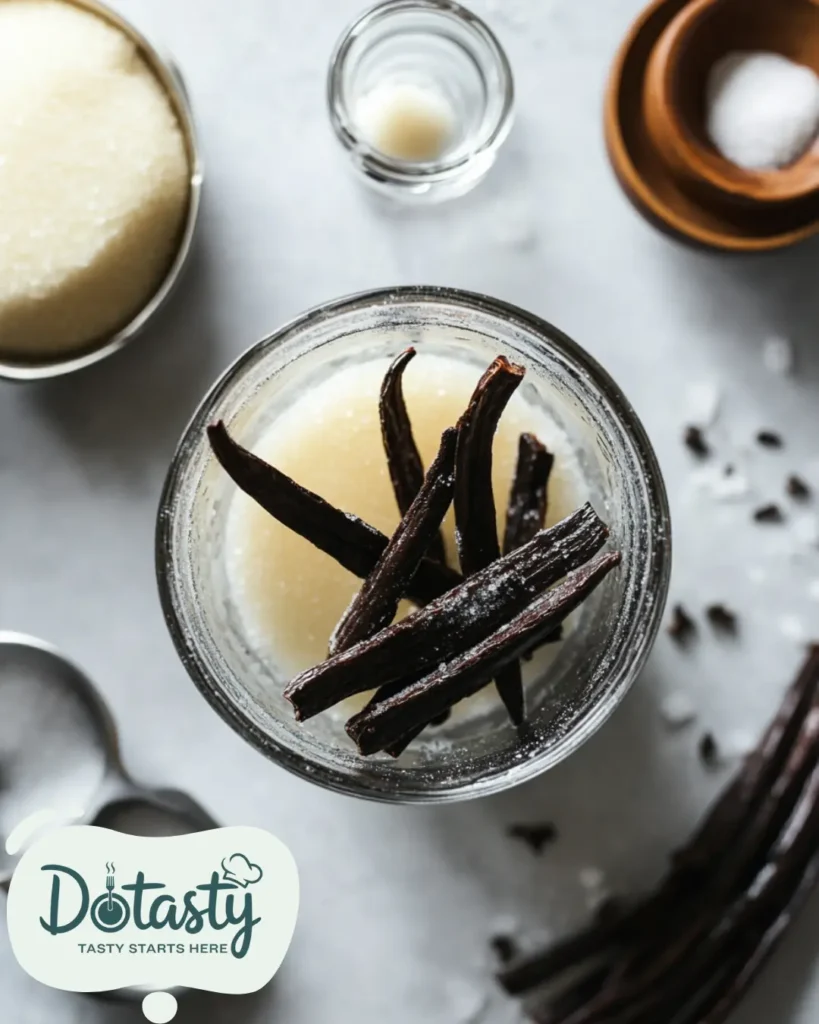
Step 1 – Prepare the Vanilla Beans
Begin by laying your vanilla beans flat on a cutting board. Using a sharp knife, carefully slice each bean lengthwise to expose the tiny, aromatic seeds inside. You’ll want to scrape out as many of these seeds as possible—they’re where the richest flavor hides. Keep both the seeds and the pods; they’ll all go into the mix.
Step 2 – Blend with Sweetener and Alcohol
Next, place the vanilla seeds and pods into a high-powered blender or food processor. Add your sugar (or sweetener of choice) and alcohol. Blend until the mixture is thick and flecked with vanilla seeds. It doesn’t need to be perfectly smooth—a little texture adds charm to homemade vanilla paste recipe.
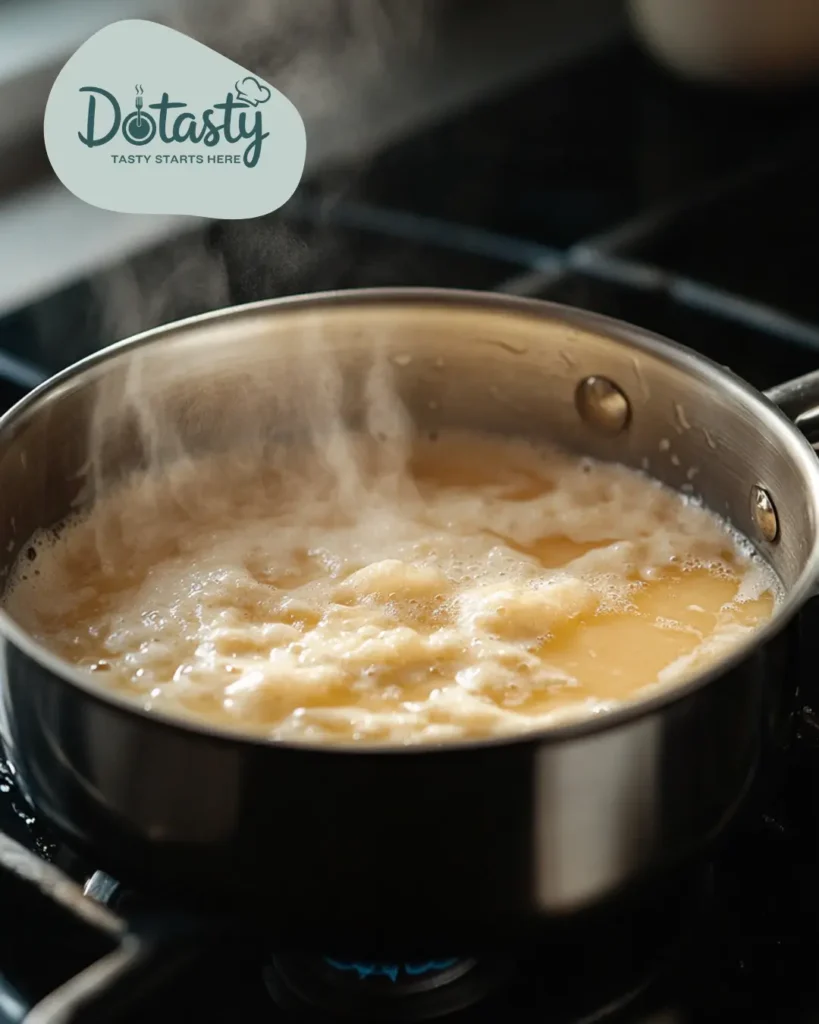
Step 3 – Simmer Gently to Thicken
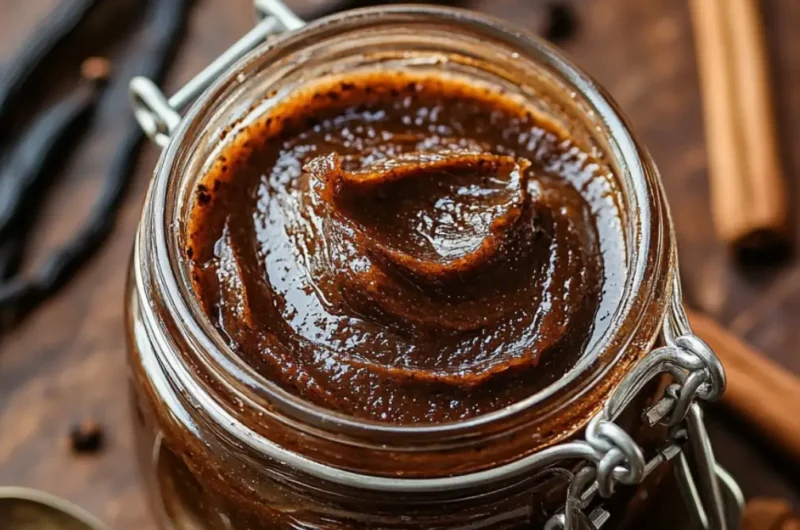
Pour the blended mixture into a small saucepan over low heat. Stir gently and allow it to simmer softly, not boil. You’re aiming for a thick, glossy texture that will coat the back of a spoon. This step usually takes about 10–15 minutes. Keep an eye on it so it doesn’t scorch.
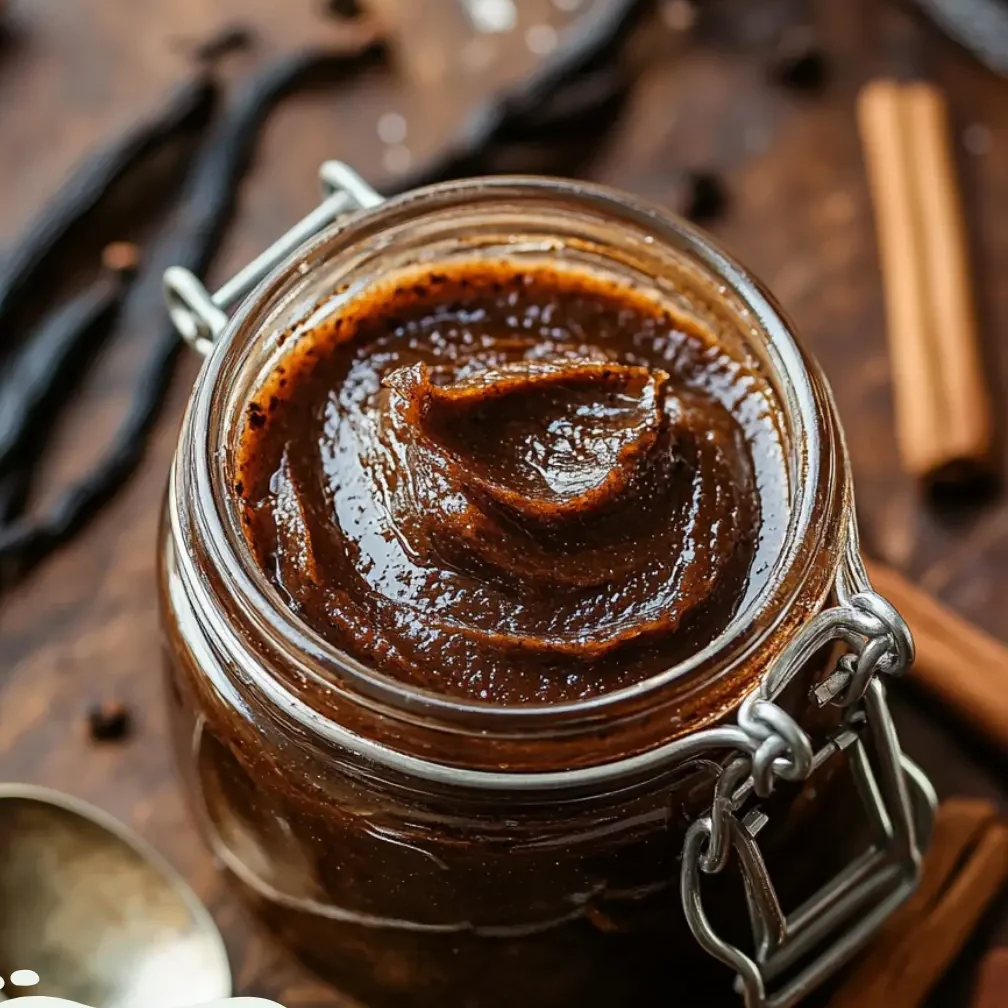
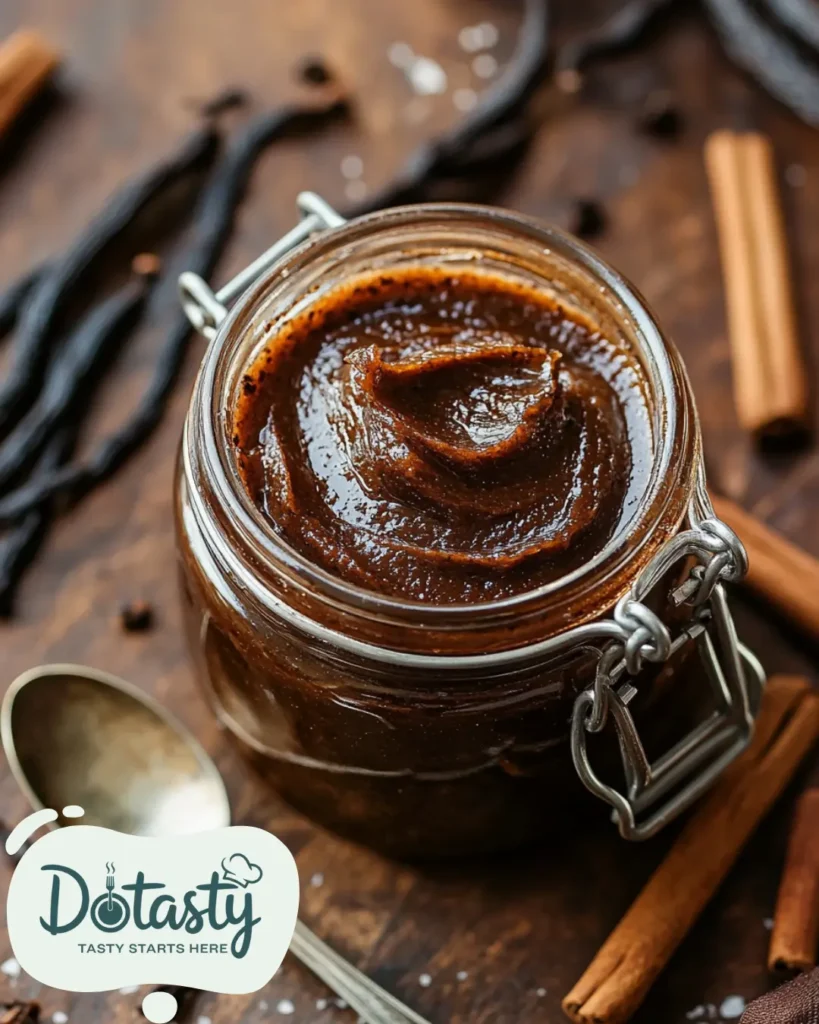
Step 4 – Cool and Bottle
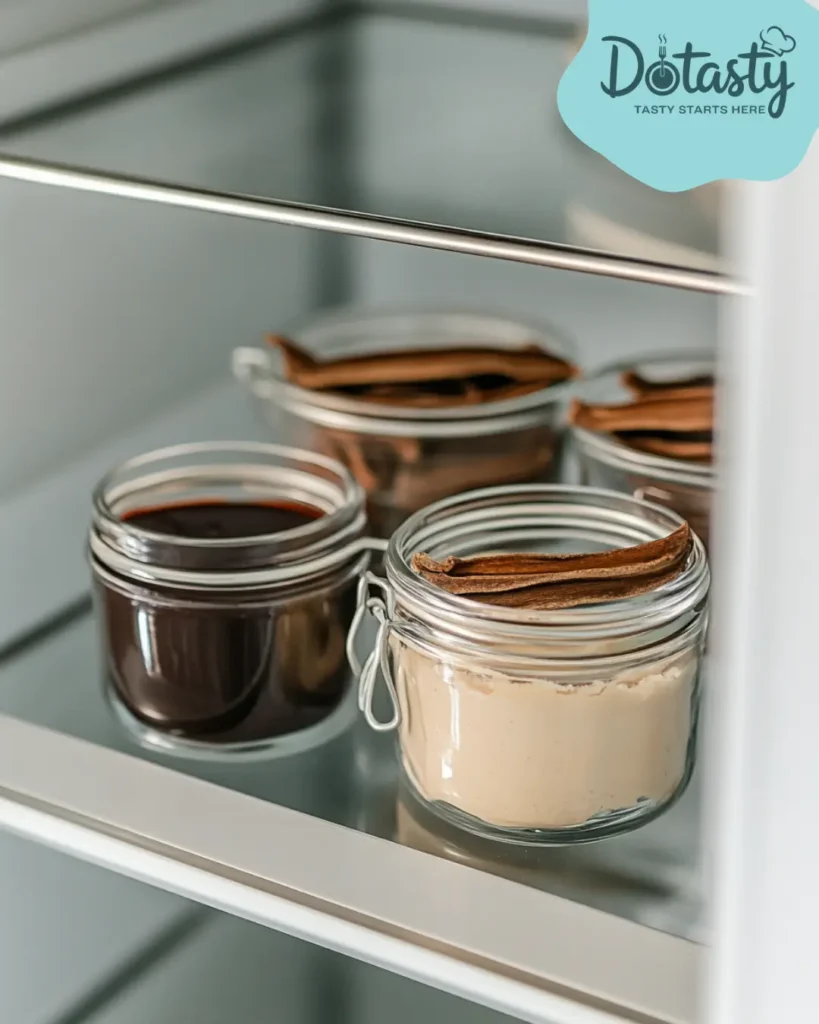
Once thickened to your liking, remove the pan from the heat and let the paste cool slightly. Transfer it into a clean glass jar or bottle. As it cools completely, it will continue to thicken slightly, developing even richer flavor over time.
Part 4: Tips for Success
Making your own vanilla paste recipe at home is a wonderful experience, but a few small details can make all the difference between a good batch and an outstanding one. Here are a few tips to help you along the way:
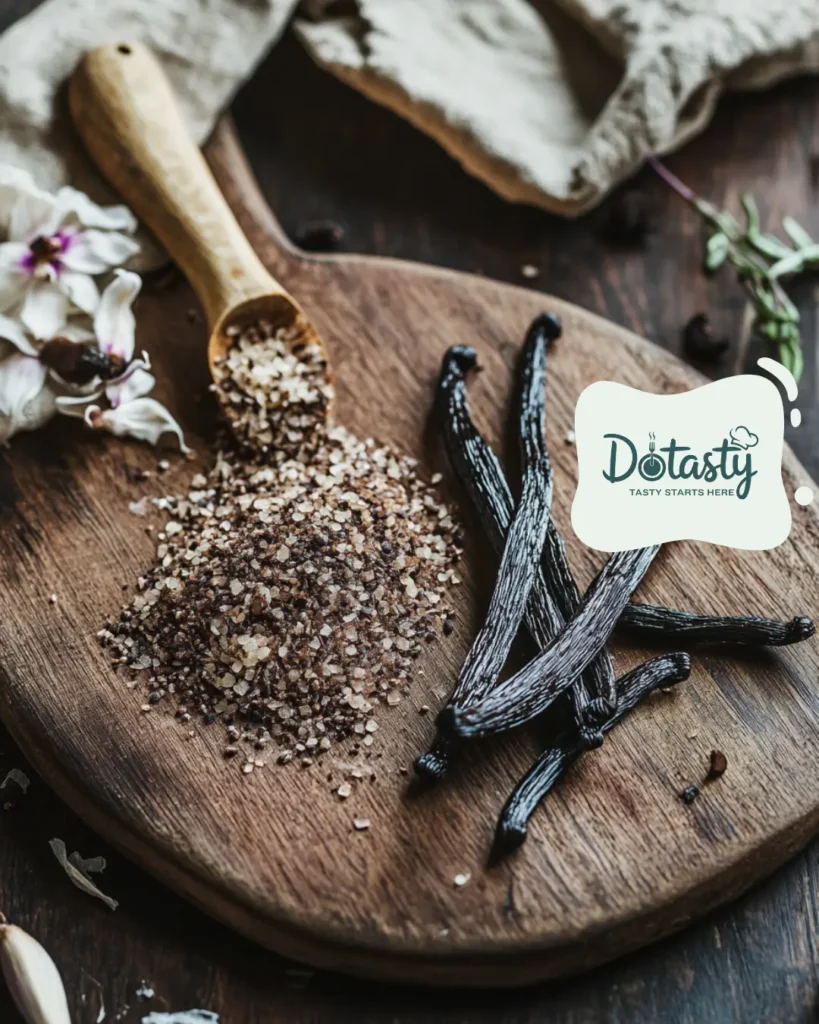
- Choose the Best Vanilla Beans:Look for beans that are moist, plump, and flexible. Dry or brittle beans will be harder to work with and won’t release as much flavor.
- Scrape Thoroughly:When slicing the beans, take your time scraping out every last seed. These tiny flecks are packed with rich vanilla flavor and give the paste its beautiful, speckled appearance.
- Low and Slow is the Secret:When simmering, keep the heat low and stir often. High heat can burn the sugar and dull the bright vanilla notes you’re aiming for.
- Use Clean, Sterile Jars:Storing your finished vanilla paste in a clean, dry jar helps it last longer and keeps unwanted bacteria away. A simple rinse with boiling water will do the trick.
- Taste and Adjust:If you want a sweeter paste, add a little more sugar during blending. Prefer something more robust? Let it simmer an extra minute or two for deeper caramel notes.
These thoughtful touches ensure your vanilla paste recipe not only tastes incredible but also stays fresh and fragrant for months.
Explore even more homemade goodness with our Creamed Honey Recipe. It’s a smooth, naturally sweet spread that’s perfect for breakfasts, desserts, and gifting to loved ones.
Part 5: Serving Suggestions
Homemade vanilla paste recipe isn’t just for baking—it’s a versatile treasure that can add depth and luxury to many of your favorite treats. Here are some delicious ways to put your homemade vanilla paste to good use:
- Baking Classics:Stir a spoonful into cakes, cookies, muffins, or scones. It brings a stronger vanilla flavor than extract and looks beautiful with those tiny vanilla bean specks.
- Frostings and Creams:Blend it into buttercream frosting, whipped cream, or pastry cream. It melts smoothly, adding a rich, authentic flavor that stands out.
- Sweet Breakfasts:Add a bit to pancake batter, French toast custard, or waffle mixes. It turns a simple breakfast into something that feels special and memorable.
- Coffee and Drinks:A dab in your morning coffee, latte, or hot cocoa brings a café-worthy touch right to your own kitchen.
Pairing vanilla paste recipe with warm, buttery pastries or cool, creamy desserts will showcase its beautiful, complex flavor in every bite.

Part 6: Variations and Customizations
One of the best parts of making a homemade vanilla paste recipe is how easy it is to customize. Whether you want to match a special dietary need or just add your own creative twist, here are some ideas to make the recipe truly yours:
- Alcohol-Free Vanilla Paste:If you prefer to avoid alcohol, replace the vodka or rum with a small amount of water and a few tablespoons of vegetable glycerin. It will still help preserve the paste and keep the texture nice and smooth.
- Sugar-Free or Keto-Friendly Version:Instead of regular sugar or corn syrup, use a sugar substitute like erythritol or a monk fruit sweetener. Keep in mind that some sugar substitutes may change the texture slightly, so you may need to simmer it a little longer.
- Spiced Vanilla Paste:Add a small pinch of cinnamon, nutmeg, or even cardamom to your paste for a cozy, spiced flavor that’s perfect for holiday baking or adding warmth to everyday treats.
- Citrus-Infused Vanilla Paste:A little zest of orange or lemon can brighten the paste, making it especially lovely for summer desserts like fruit tarts or pound cakes.
With just a few tweaks, your homemade vanilla paste recipe can be as traditional or as adventurous as you like!
How to Store and Reheat
Keeping your vanilla paste recipe fresh and flavorful is all about good storage. Because it’s made with real vanilla beans and natural ingredients, it deserves a little extra care to maintain its wonderful aroma and texture.
- Storage:Once the paste has cooled completely, store it in a clean, airtight glass jar. A small mason jar or recycled spice jar works beautifully. Keep it tucked away in a cool, dark spot like your pantry or cupboard. If your kitchen tends to be warm, the refrigerator is a safe option to extend its shelf life.
- Shelf Life:Properly stored, homemade vanilla paste will last for about 6 to 12 months. The alcohol acts as a natural preservative, but always use a clean spoon when scooping to avoid introducing moisture or bacteria.
- Reheating:Generally, vanilla paste doesn’t need reheating. However, if it thickens too much over time, you can gently warm the jar in a bowl of hot water for a few minutes. Stir it softly to bring it back to a pourable consistency without losing any of that precious flavor.
Taking just a few minutes to store it properly ensures you’ll have rich, fragrant vanilla paste recipe ready whenever inspiration strikes.
Can You Freeze Vanilla Paste?
You might wonder if you can freeze your homemade vanilla paste recipe to make it last even longer. The good news is—yes, you can, but with a little caution.
Because vanilla paste contains alcohol and sugar, it doesn’t freeze rock-solid like water. Instead, it thickens considerably and may become a little sticky. Freezing works best if you portion the paste into small, airtight containers or freezer-safe jars. That way, you can thaw just what you need without disturbing the rest.
When ready to use, let the paste thaw slowly in the refrigerator overnight or set it on the counter for a few hours. Give it a gentle stir to bring back its smooth consistency.
Freezing is a handy option if you’ve made a large batch or want to have extra on hand for special baking projects later on.
Vanilla Paste Recipe Card
Homemade Vanilla Paste
Course: DessertCuisine: AmericanDifficulty: Medium20
servings15
minutes15
minutes45
kcalA rich, fragrant, and customizable vanilla paste made with real vanilla beans, perfect for baking and desserts.
Gather Your Goodies
Vanilla beans (Madagascar, Tahitian, or Mexican)
Granulated sugar (or honey/agave syrup)
Vodka or rum (or water + glycerin)
Corn syrup (or glycerin/maple syrup)
Let’s Get Cooking
- Slice vanilla beans lengthwise and scrape out seeds.
- Blend seeds and pods with sugar and alcohol until thick and speckled.
- Simmer the mixture over low heat until glossy and thick (10–15 minutes).
- Cool slightly, then transfer to a clean jar and let it cool completely.
Notes
- Use moist, plump beans; low heat prevents burning; sterilize jars for longer shelf life.
Stay connected and get daily cooking inspiration by following us on TastyDo Facebook! Join our community for exclusive recipes, kitchen tips, and delicious ideas.
FAQs About Vanilla Paste Recipe
Here are a few common questions folks have when making or using a homemade vanilla paste recipe:
How much vanilla bean paste is equal to 1 tsp vanilla extract?
One teaspoon of vanilla bean paste is generally equal to one teaspoon of vanilla extract. However, because paste contains real seeds, it delivers a slightly richer flavor and a beautiful speckled appearance in your baked goods.
Which is stronger: vanilla extract or paste?
Vanilla paste tends to have a stronger, deeper flavor than extract because it includes the whole vanilla bean seeds along with the extract. If you love a bold vanilla flavor, paste is a wonderful choice.
Can you use vanilla extract as vanilla paste?
Yes, in most recipes you can substitute vanilla extract for paste at a 1:1 ratio. Just remember that you’ll miss out on the charming flecks of vanilla seeds, and the flavor might be a touch lighter.
How long will vanilla paste last?
When stored properly in a cool, dark place or the refrigerator, homemade vanilla paste can last between 6 and 12 months. Always use a clean spoon and tightly seal the jar after each use to keep it fresh and flavorful.
Final Thoughts on Vanilla Paste Recipe
There’s something truly special about making your own vanilla paste recipe at home. From the first slice of the vanilla beans to the final spoonful stirred into a cake batter or creamy custard, it’s a process filled with comfort, care, and just a little bit of magic.
Homemade vanilla paste doesn’t just bring better flavor—it brings a personal touch to everything you bake. Every fleck of vanilla seed is a reminder of the love and tradition that go into homemade treats.
If you try this recipe, I’d love to hear how it turns out for you! Feel free to leave a comment or a rating—and if you’re looking for more kitchen projects that bring a little nostalgia and a lot of joy, be sure to explore my other favorite baking recipes too.